Take a listen. Let me know what you think…
The track above is the fruit of my (recent) labor. I think I did a pretty good job mixing it. The vocals sit better in the mix than most of my other songs. Let me know what you think about it.
So, whatcha’ make that with?
When I record I use Logic Pro, I feel that it’s the best DAW out there – especially for the money. It’s got the power and versatility that any artist needs to record their tracks. It works really well for my workflow, because it comes bundled with a great collection of soft synths and samplers. In all fairness, sampling with a soft sampler is not as easy or intuitive as an MPC. However, it works for me. When you listen to the track, you’ll notice it’s loaded with samples. Most of them come directly from Logic’s robust sample library. All these features are perfect for my workflow.
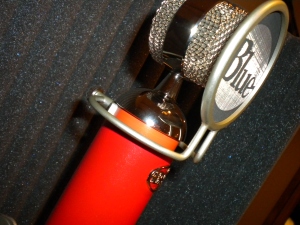
The only live audio in this track is my voice, the vocal tracks (there are three) were recorded with my blue spark. For $199 this mic is great for vocals, and pretty much everything else. The mic by itself has a bit of a ‘robotic tin’ kind of sound, so tracks usually need some warming up, for me that’s a little compression from a CLA-76 Compressor, then EQ’ed with a SSL G-Channel and then a wee bit of reverb with Logic’s wonderful Space Designer. If you use Logic and record Hip Hop vocals, or hell, ANY VOCALS, I highly recommend the SSL G-Channel plugin from Waves. Waves plugins are incredibly expensive but also highly recommended. In my opinion they’re worth it. I’m not trying to shill for Waves, but they do make some nice plugins. Some of their other plugins aren’t really worth the money one would spend on them. I like the idea of plugins like the Doubler, which takes audio and makes it sound like it’s doubled up or as if you recorded another take over it. This would be great for choruses and vocals but I just can’t dial it in to a point where it actually sounds good. Plus I’m not about to drop a shit load of money for a plugin that is pretty unnecessary if one has a mic. Just recorded your own over dubs.
Producing and Mixing
When I start creating a track, I usually just sit down and start working. I don’t usually have an idea in mind, but in this case I knew what I was going for. I wanted something that sounded nice and LoFi, and had that banging snare every eight bars. Creating a LoFi sound was a lot harder than I thought, because the sound can suddenly become overwhelming. This leads to the whole song sounding like shit. To solve this problem I simply created an AUX track that had all the effects I needed for a LoFi sound, and subsequently added that AUX track as a send for my instrument groups. You can see it the photo above, the LoFi channel is labeled BUS 13 in all of the drum groups.
Speaking of drum groups, I usually layer the hell out of my drums. In this song I used four different drum sounds (some intermittently) to get the sound I was looking for. The same is true for the snare, which has three layers throughout. Mixing these is completed by changing the output on the respective drum track to whichever Bus I had created for the drums. One important thing to point out is that I always separate my drums, one drum per track. So I have tracks for each kick, snare and so on. Some people don’t do this with sampled drums, but I think it’s just good practice to treat every sample like its own recording.
It took me five different tries to get the song to sound the way I wanted to. You can hear the original instrumental here, this was my second try at the mix of just the instrumental. You can really hear the difference between that and the final track. Anyway, I hope you enjoy my new track. I just thought I’d give a little background on the song I’ve created. Enjoy, and feedback is always welcome!


